
Open CDRWin, click on the wrench (if mouse hovers over it, it shows “File Backup and Tools”).
Step 1

Open CDRWin, click on the wrench (if mouse hovers over it, it shows
“File Backup and Tools”).
Step 2

Select an image filename — this can be any PDP-11 disk image, such as a
block-by-block image of a PDP-11 disk generated by or for a real PDP-11 or the
E11 or Supnik emulators.
Step 3

Select or unselect any desired options. Write Postgap is optional; if
unchecked then the extracted track will be the same size as the disk image,
without the 600. 512.-byte blocks of zeroes appended to it. The readable
sectors on the CD will end with the logical end of volume, that is, the end
of the bad block file for RSX. Then click the START button.
Step 4
Eject the CD. The CD is now usable under E11 and (presumably) if
connected to a real PDP-11 via e.g. a SCSI CD-ROM drive.
To use the CD under E11 (v2.2 and up), if one is running Windows 95 or up, reboot into plain DOS so the first 16. CD sectors are normally readable (they can also be read with CDRWin’s sector editor from within Windows, but this utility will not save its contents to the Clipboard or a file, nor allow it to be used by the emulator). Set the desired CPU (e.g. set cpu 94 and mount the disk(s) with a command such as mount du0: cdromi: — one can also mount other devices such as an RL01/RL02 by MOUNTing e.g. DL0:; also more than one disk can be mounted in this manner by substituting the correct drive letter (in the above example, cdromI: refers to the CD-ROM/R/RW drive on I:). One may boot the CDROM or just read it; an example follows.
E11>set cpu 94
E11>mou du: cdromj:
E11>mou dl: cdromi:
E11>boo dl/rsx

[PDP-11 OS boots up from CD — one can then mount and read additional CD’s]
[in this example, RSX with the MCR CLI is booted on DL0: and then DU0: is
 mounted; both of these devices are physically CD’s]

> MOU DU:/ovr
> PIP ti:=DU0:[0,0]/LI/Y4


Directory DU0:[0,0]
21-DEC-01 17:57

INDEXF.SYS;1      2050.        07-JAN-1999 12:45
[...]
Note that most standard and baseline PDP-11 operating systems do not like to be booted from a readonly disk, but with a few modifications it will work fine (e.g. in RSX, fix tasks into the system image; in RT-11, don’t try to save SET parameters and so forth to disk; in any OS, tell the error logger and accounting system to write to a writable disk (not a CD).
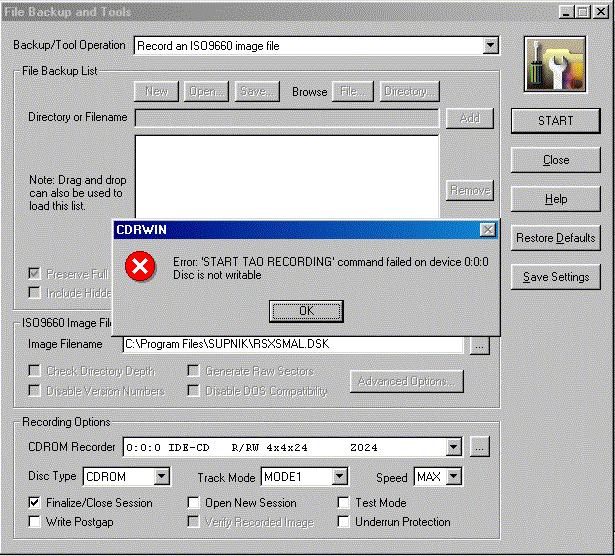
This error occurs if you don’t erase a previously-written CD-RW before
rewriting it.
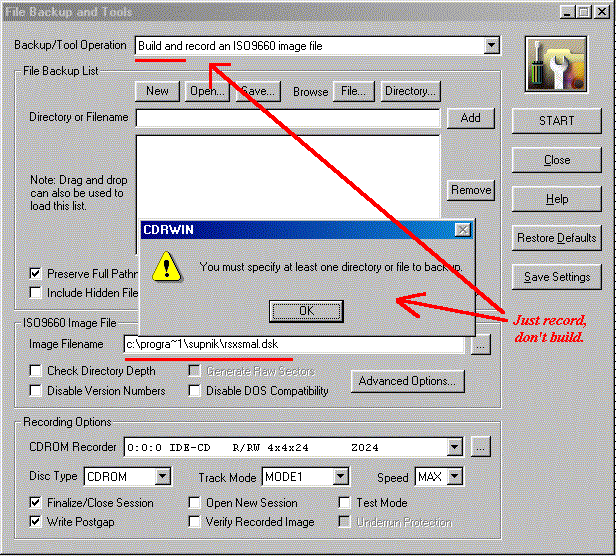
This occurs if CDRWin selects Build and Record instead of just
Record after switching screens: make sure it is set to just
“Record” before STARTing it.
Step 1
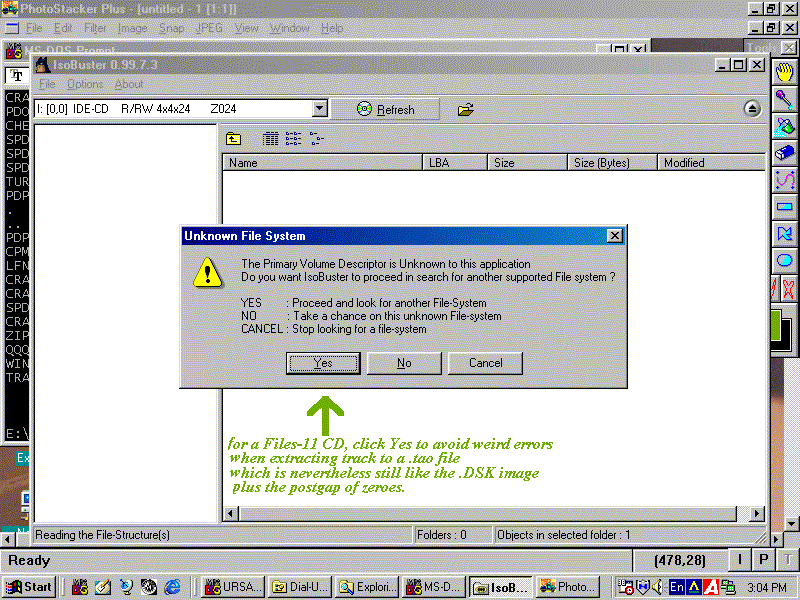
Start ISO Buster. Insert the Files-11 or other PDP-11 or nonstandard
CD into the drive. Click Refresh if changing CD’s after
starting ISO Buster. It will indicate that the file system is unknown —
click on Yes so that it will not try to interpret the PDP-11
disk as an ISO9660-format image.
Error to avoid
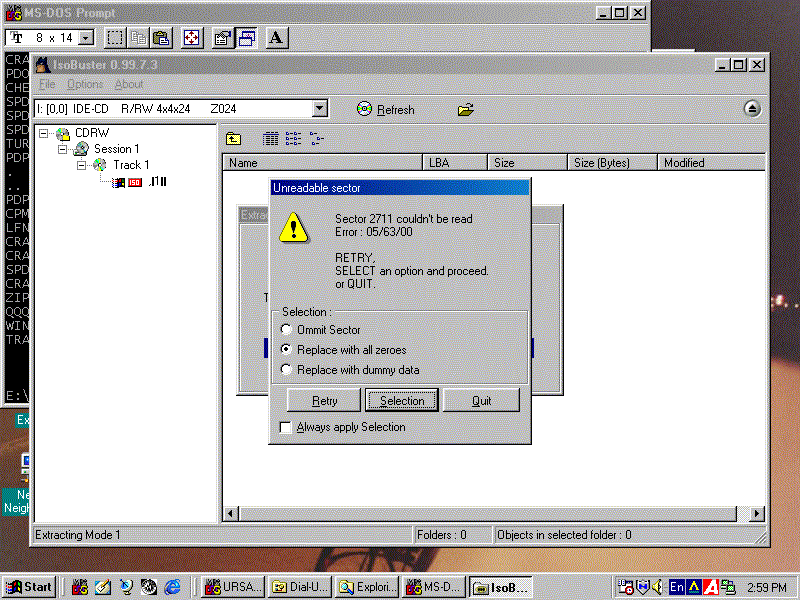
If you click No instead, ISO Buster will try to interpret the Files-11
or other PDP-11 disk structure as an ISO9660 filesystem. The result is the
gibberish here shown next to the red ISO indicator. The track will still
extract normally, since track extraction is independent of any file structure
on the track, but the Unreadable sector error can appear as shown — this
“unreadable sector” is after the actual disk image data so if
this extracted track is compared to a track properly extracted, the contents
are the same.
The proper way to extract a track, and summary
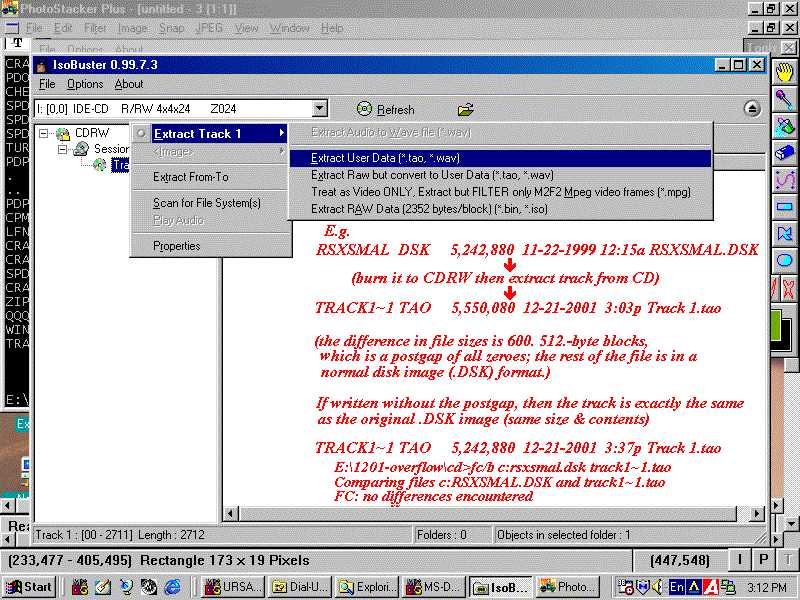
If one clicks Yes, the CD structure appears and one can extract
the track as shown. There is no choice in filename; as soon as one selects
Extract User Data, click on the directory display to navigate to the
directory to save the image in; the name of the image will be “Track
1.tao” (in general, “Track n.tao”, where n is the number of
the track, but in this case the disks will have only one track). If one is
extracting tracks from more than one CD, be sure to have a DOS prompt or
Explorer also running to move the previous .tao images to another directory;
ISO Buster will ask whether to overwrite any files of the same name it
encounters, but will not offer the option of renaming in this case. (.TAO
refers to Track At Once.)
If the disk image was saved without a postgap, the resulting .tao file is identical to the original .DSK image in both size and contents, as can be verified with diff, fc/b and similar utilities. If a postgap was written, the track contains the disk image plus 307,200. bytes of zeroes (i.e. 600. blocks of 512. bytes or 150. sectors of 2048. bytes).
Click here to send me comments.
This page has been visited
times
since December 21, 2001.
Page created  December 21, 2001
Last modified December 21, 2001